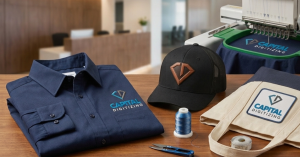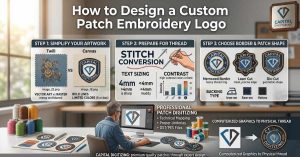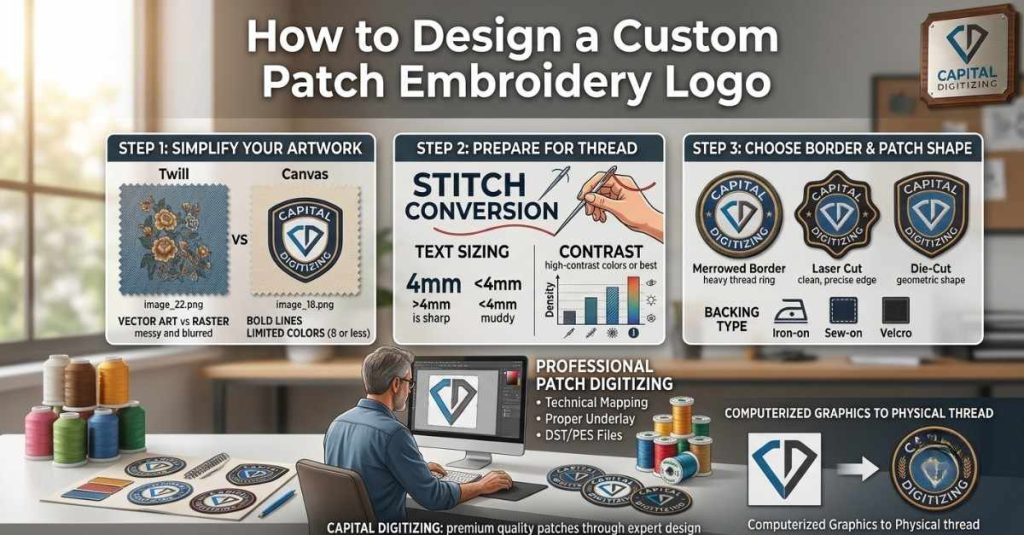
Designing a custom patch embroidery logo is all about going from computerized graphics to physical thread. Embroidery is not like printing because it depends on texture, stitching density, and physical limitations. With the right simplification of your artwork and the use of vector formats, your brand personality can be made into a long-lasting, effective embellishment for anything.
Why Logo Design for Patches Is Different from Print
If you believe you can simply print a logo onto some fabric and say it is a patch, think again! Printed logos make use of minute gradations, small writing, and thin details that are not possible to recreate with embroidery thread.
Embroidery is a physical process. Each stitch has weight, density, and thickness. If your logo patch design is too cramped, the needle will simply turn it into a muddy mess. You need an embroidery-ready logo design that accounts for these physical constraints. When planning for custom logo embroidery, remember these factors:
- Physical limitations: Needles, thread weight, and fabric tension dictate the outcome.
- Stitch conversion: Patch digitizing services do not involve auto-tracing. Instead, it involves manually plotting the pattern using stitches.
- Complexity: Complicated patterns have to be streamlined so that the result is clear to see on the equipment. This process often improves the effectiveness of an embroidery-ready logo design.
- Durability: Unlike ink, thread retains both its color and texture after being washed hundreds of times.
Start with a Vector or High-Resolution File
You get out what you put into something. You send a bad picture, you’re going to receive a bad product. You need a quality image representing the essence of your brand to achieve the best embroidered logo patches for your project. To ensure high-quality embroidered patch artwork, follow these guidelines:
- Preferred Formats: AI, EPS, or PDF (Vector).
- Alternative: Use a PNG file, but make sure its resolution is at least 300 DPI.
- Scaling: Vector image files allow us to scale up/down your logo to any size you like.
- Conversion: If you lack professional files, we can rebuild your embroidered patch artwork from scratch to ensure a clean stitch-out.
Simplify Colors and Detail for Thread
In the world of thread, less is often more. Most standard patches look best with 8 or fewer colors. Adding more colors increases the thread changes during production, which can impact the efficiency of your run. This is a critical step in finalizing your logo patch design.
- Color Matching: We replace complex gradients with solid, thread-matched colors like Madeira or Isacord for maximum pop.
- Text sizing: Make sure that fonts used are more than 4mm to keep them sharp and easy to read.
- Contrast: Colors need to be of a high-contrast nature as well, so that text can still be read from afar.
- Stitching Density: Spacing must be right so that there is no bunching of stitches on the fabric. Proper spacing is essential for any embroidery-ready logo design.
Choose Your Border and Patch Shape
The shape of your patch determines how it’s finished and how it looks on your equipment. Your design choices here directly influence the final aesthetic of the custom logo embroidery.
- Merrowed Border: A heavy border encircled with threads; suitable for traditional round or square patches.
- Laser Cut: It produces a clean-cut design; preferred when creating embroidered logo patches or shields.
- Die-Cut: Applicable for geometric designs that require specific sizes for mass production purposes.
- Backing types: You can select from iron-on, sew-on, or Velcro, depending on the intended application of your embroidered logo patches.
Submit to a Patch Digitizing Service
Once you have your art, you need a professional to handle the patch digitizing services. A real digitizer ensures your design is ready for high-speed industrial embroidery machines.
- Technical mapping: We map satin, fill, and running stitches to define every element of your custom logo embroidery.
- Stability: Proper underlay is applied to prevent fabric puckering and maintain the patch’s structural integrity.
- Output: You receive industry-standard files like DST or PES that work with all major custom logo embroidery equipment.
- Efficiency: We deliver embroidery-ready logo design files within 24 hours.
Review Your Digital Proof Before Production
Never skip the digital proof. This is your insurance policy against production errors. A digital simulation allows you to see the actual path the needle will take. Verifying your embroidered patch artwork is crucial.
- Verification: Check spelling, alignment, and color placement before the machines start.
- Efficiency: Patch digitizing services corrections at the proof stage are free and quick, saving you money on re-runs.
- Quality control: Asking for an image of a physical sample can be arranged in bulk orders to guarantee satisfaction.
- Final sign-off: We will immediately start production to maintain your deadline after approving the embroidered patch artwork design proof.
Common Mistakes That Ruin Embroidered Logo Patches
| Mistake | Why It Fails | Fix |
| Using a raster logo | Blurry stitch paths | Convert to a vector first |
| Too many colors | The thread changes slow production | Limit to 8 colors |
| Tiny text | Unreadable under 4mm | Simplify or enlarge |
| Skipping the proof | Errors go to full production | Always approve proof first |
| Wrong file format | The digitizer can’t process | Submit AI, EPS, or 300 DPI PNG |
Preparation of files is key to avoiding any costly time lags and ensuring that all finished products are of top-notch quality. Good-quality artwork will help us work efficiently and preserve your brand image. Check our guide: How to Prepare Artwork for Embroidery Digitizing. A properly planned logo patch design and reliable patch digitizing services can help avoid many of these common issues.
Conclusion
Effective logo patch design requires linking creativity and technical execution. Having designs that are not too complicated, vector art that is high-resolution, and professional digitalization of your design ensures your logo works well on the thread. You will ensure that you come up with premium-quality patches after a very thorough proofing process by following these tips with Capital Digitizing.
Trust Capital Digitizing for premium, high-durability patches, where expert design and professional execution bring your brand to life.
FAQs
1. How do you design a custom patch embroidery logo?
Simplify your artwork, use vector files, and partner with a professional digitizer for production.
2. What makes a logo suitable for embroidery patches?
High-contrast designs with bold lines, limited colors, and text larger than 4mm are ideal.
3. What file format is best for patch logo digitizing?
Vector formats like AI or EPS are the industry standard for clean, scalable embroidery files.
4. How does embroidery digitizing affect logo quality?
It maps thread paths and density, ensuring the design remains legible and durable on fabric.
5. What colors work best for embroidered logo patches?
Limit designs to 8 colors or fewer to optimize thread changes and maintain production efficiency.
6. Can a complex logo be converted into an embroidered patch?
Yes, professional digitizers simplify complex elements to ensure they translate perfectly into stitches.