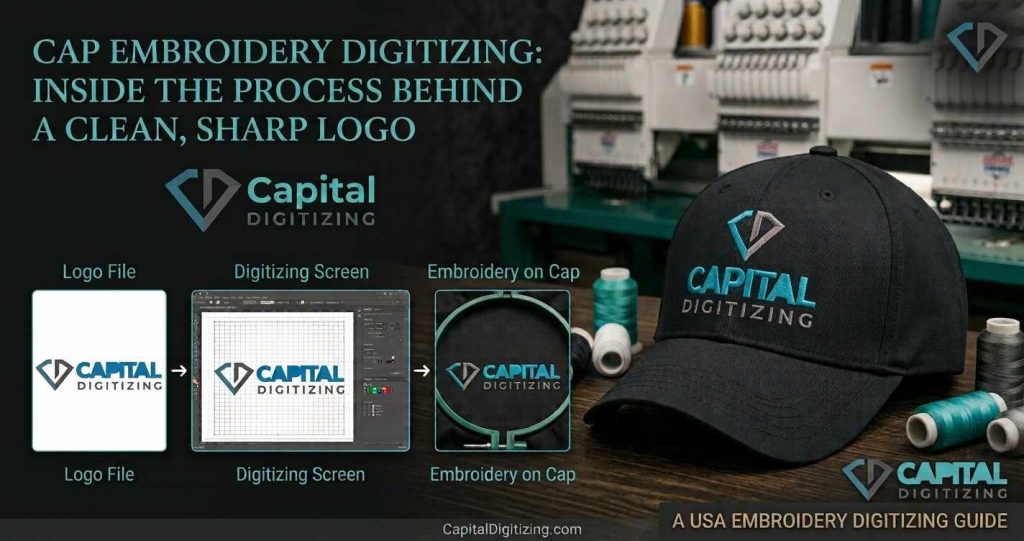
There’s nothing more annoying than sending a nice, clean logo to an embroidery machine and seeing it come out all crooked and messy on a cap. If you’ve ever looked at text or a design that looks weird because it doesn’t fit well on a curved surface, you understand the difficulty of using a flat design on a curved area. At Capital Digitizing, our embroidery digitizing services turn flat digital designs into high-quality stitched images on fabric, so your brand looks great wherever it’s seen.
Why Cap Logos Distort Without Proper Digitizing
Caps are never flat. The front panel curves sharply, meaning a standard flat digitizing file stretches unevenly once the machine starts running.
- Panel Curves: Applying flat-garment digitizing files directly to caps causes pulled edges and warped text because the stitches pull horizontally across the curve.
- Foam Fronts: Foam-backed structured caps add another layer of distortion risk if density isn’t carefully adjusted to prevent sinking.
- Seam Interference: The center vertical seam acts as a speed bump for needles, throwing off alignment if the path isn’t mapped properly.
Underlay and push/pull compensation must be recalculated specifically for the cap’s unique geometry. Before sending artwork to production, learning how to prepare your logo can save you hours of trial and error.
What Is Cap Embroidery Digitizing?
Professional embroidery digitizing means transforming a flat design into a special stitch format file (DST, PES, EXP), which is specially mapped to the geometrical shape of a cap. Unlike flat embroidery files, cap digitizing essentially modifies stitch angles, stitch density, and underlay pattern to overcome the tension of a cap’s surface.
No matter if you are making snapback hats, dad caps, trucker hats with mesh, or flat-bill hats, having a custom cap file stops the fabric from moving while you sew. Ultimately, a good digital cap file is what makes a brand look professional and sharp instead of cheap and blurry. If you have intricate artwork, you can also look into specialized digitizing for complex logo designs to see how fine lines are preserved.
Inside the Curved Surface Stitching (Center-Out Technique)
Digitizing for hats must involve a unique approach to ensure that the fabric doesn’t move when being stitched.
Unlike flat shirts, where stitching is done from left to right, professional digitizers use the Curved Surface Stitching (Center-Out Technique). This starts at the exact middle seam of the cap panel. It goes out symmetrically in two directions from this point.
| Step | Center-Out Focus | Purpose |
| 1 | Set center reference point | Anchors design securely to the cap’s curve |
| 2 | Digitize outward, left half | Maintains proportion across the center seam |
| 3 | Digitize outward, right half | Mirrors tension and stitch angle perfectly |
| 4 | Adjust density at edges | Prevents pulling near the cap’s side panels |
For custom hats, relying on a dedicated cap embroidery digitizing service guarantees these physical constraints are factored in before production starts.
Step-by-Step: How a Clean Cap Logo Gets Digitized
Achieving a retail-ready cap logo takes more than clicking an “auto-digitize” button. Working with the best embroidery digitizing companies involves following a strict workflow:
- Artwork Review: Checking for fine text, thin lines, or gradients that will collapse under thick embroidery threads.
- Template Setup: Loading the design onto a cap-shaped virtual template rather than a flat hoop workspace.
- Applying Core Techniques: Implementing the Curved Surface Stitching (Center-Out Technique) to balance push-and-pull compensation.
- Material Tuning: Adjusting underlay stitches based on whether the cap is structured buckram, unstructured cotton, or mesh.
- Test Stitching: Running a physical sample test on an actual cap blank to catch tension issues before mass production.
Skipping that physical cap test run is where most distortion issues slip through the cracks. Take shortcuts here, and you will see puckering in no time.
Get Your Logo Digitized for Caps →
Common Cap Digitizing Mistakes That Ruin a Logo
Avoiding rookie errors saves time, thread, and ruined blanks. Keep these common traps in mind:
- Reusing Flat Files: Dropping a flat-garment file directly onto a cap without re-orienting stitch angles.
- Over-Saturation: Pumping up the stitch density too high, which creates a stiff, bulletproof patch that puckers foam-front caps.
- Ignoring the Seam: Placing delicate text or thin connection points directly over the center vertical seam.
- Disregarding Minimum Letter Sizes: Designing lettering smaller than 5mm that inevitably fills in and becomes unreadable.
For a broader breakdown of what drives hidden fees and quality trade-offs across the industry, read this external Embroidery Digitizing Cost & Pricing Guide.
What Does Cap Embroidery Digitizing Cost?
When searching for quality embroidery digitizing companies in the USA, pricing usually ranges based on complexity instead of flat hourly rates.
| Factor | Impact on Price |
| Stitch count/logo complexity | Higher stitch count = higher cost |
| Number of thread colors | More colors = more color-change setup time |
| Cap-specific curve adjustment | Requires re-digitizing vs. flat file reuse |
| Turnaround speed | Rush requests typically cost more |
The cheapest quote often skips the curve-specific rework a cap desperately needs, which is where quality separates the embroidery digitizing services from budget operations that ruin your merchandise.
Choosing Among Embroidery Digitizing Companies in the USA
Not all digital workshops understand American cap sizing, structured buckram standards, or fast retail turnarounds. When vetting embroidery digitizing services in the USA, keep these selection tips in mind:
- Ask to see real cap-specific physical stitch-outs, not just digital vector mockups or flat shirt portfolios.
- Confirm whether they test-stitch files on real cap blanks before sending you the final format.
- Check their revision policy for curve-related corrections.
- Ensure they have proven experience handling structured snapbacks, trucker hats, and low-profile dad caps alike.
Conclusion
Changing a flat logo into an easy design for a cap that can be sold in stores needs special skills to consider the curved parts, padded fronts, and the seams in the middle. Using the center-out method, effective push-and-pull adjustments, and tuning for different materials, expert digitizers at Capital Digitizing make sure your brand looks clear and sharp on any type of hat.
Capital Digitizing turns flat concepts into crisp, distortion-free cap embroidery using expert center-out pathing and advanced curve compensation.
FAQs
1. Why is cap digitizing different from flat embroidery digitizing?
Cap panels curve sharply, requiring custom stitch angles, density adjustments, and push/pull compensation to prevent distortion.
2. What is “center-out” stitching and why does it matter for caps?
It is a technique starting at the center reference point and working outward to keep logos balanced across curves and seams.
3. Can any logo be digitized for a cap?
Yes, but fine lines, gradients, and tiny text must be adapted to avoid collapsing under thick threads.
4. What’s the ideal logo size for cap embroidery?
Lettering should stay above 5mm to prevent lines from filling in and becoming unreadable on textured fabrics.
5. Do curved caps need special stitch density settings?
Yes, density must be carefully tuned to fight fabric tension without creating a stiff, puckered patch.
6. How long does cap digitizing take?
Professional turnaround times typically range from 2 to 24 hours depending on complexity.