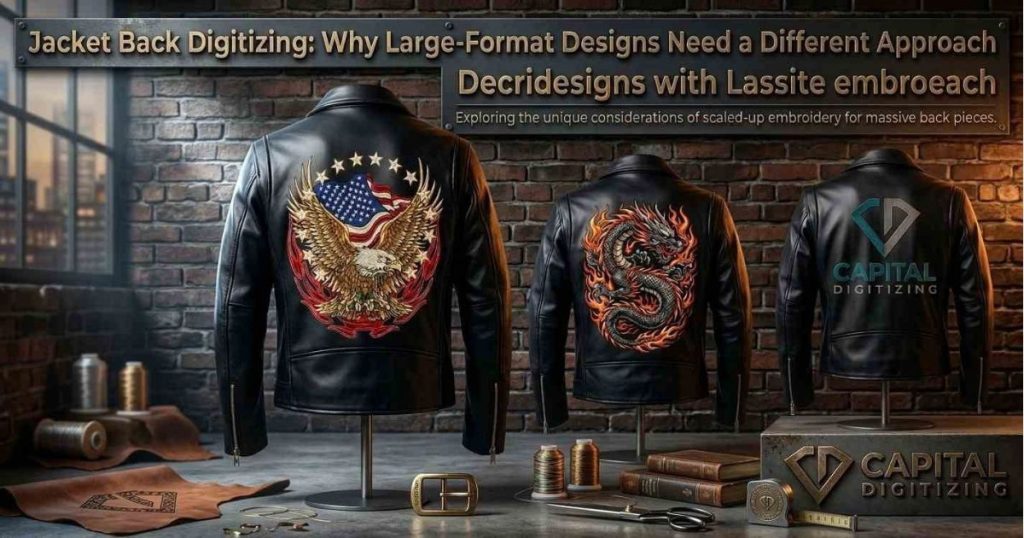
Jacket back digitizing transforms standard logos into large formats for heavy outerwear. Scaling up without professional adjustments causes puckering and thread breaks. Expert custom work utilizes specialized underlay and controlled density drops to ensure smooth stitches across wide surfaces for high-end production runs every time.
Why Jacket Backs Need a Different Digitizing Approach
Large hoop areas flex differently under the needle than a standard 4″x4″ logo. Fabric stretch across a full jacket back changes with heat, moisture, and stitch pull. A file digitized for a small chest logo will pucker, gap, or shift when scaled up without redigitizing, leading to significant frame movement and distortion during production.
When a client sends a standard logo file straight to a jacket back, the machine struggles. Hooping shifts happen because heavy pull forces distort the fabric. Balancing your production budget requires careful file planning before any run goes to the machine.
Large-Format Stitch Density & Underlay, Explained
Large-format designs present a unique physical challenge because open fill areas behave entirely differently from compact lettering or small symbols.
- Advanced Underlay Support: Underlay stabilizes large open fill areas, a crucial step that small logos rarely require. Without a solid foundation grid, wide satin columns will sink into fleece or heavy cotton.
- Controlled Density Drops: Density must drop slightly on large embroidery digitizing runs. If the stitch count is too dense over a wide area, thread builds up aggressively, causing fabric tunneling and needle deflection.
- Edge Walk and Zigzag Combinations: Combining edge walk outlines with wide zigzag foundations helps anchor the fabric to the backing material before the top stitches lock in.
- Dynamic Stitch Angles: Column directions and stitch angles must shift across a wide surface to prevent unsightly light reflection and thread show-through.
To see how complex artwork shapes influence multi-layer path planning, check out our guide on digitizing complex designs and photos.
Jacket Back Digitizing vs Small Logo Digitizing: Key Differences
To highlight how professional custom embroidery digitizing changes between a small chest emblem and a full back layout, look at how technical parameters shift:
| Factor | Small Logo File | Jacket Back File |
| Hoop size | Up to 5″ x 7″ | 12″ x 16″+ (multi-hoop or split) |
| Stitch density | Standard fill | Reduced fill + reinforced underlay |
| Digitizing time | 30–60 min | 2–4 hours |
| Thread break risk | Low | High without adjustment |
| Best suited for | Chest logos, caps | Team jackets, varsity backs, brand patches |
Note: Turnaround times vary based on design intricacy and production queues.
Common Mistakes in Oversized Embroidery Designs
Most production floors have dealt with ruined garments caused by shortcuts in the software phase. Pinpointing these common errors helps save time, thread, and fabric:
- Scaling up small files: Simply stretching a chest logo in an editing program rather than redigitizing it from scratch ruins stitch density and pull compensation.
- Ignoring split-hoop logistics: Failing to plan alignment points for any oversized embroidery design that stretches wider than a machine’s single-hoop limit.
- Neglecting fabric weight: Treating leather, heavy denim, and lightweight windbreakers the same way, ignoring the reality that different substrates require completely different underlay patterns.
- Confusing patch construction with direct sewing: Treating back patch digitizing identically to direct-to-garment stitching, overlooking the need for proper borders and structural backing.
Most severe puckering complaints trace right back to reused small-file settings rather than mechanical machine failure.
Jacket Back Embroidery Cost: What Affects Pricing
Jacket back embroidery cost scales primarily with stitch count and file complexity rather than physical size alone. Saving money upfront by opting for cheap embroidered patches often backfires when low density and weak underlay result in poor wash durability and loose loops.
| Design Complexity | Approx. Stitch Count | Typical Turnaround |
| Simple text/outline back design | 15,000–25,000 | 1–2 days |
| Detailed logo/emblem back design | 25,000–45,000 | 2–3 days |
| Photo-realistic/multi-layer back design | 45,000+ | 3–5 days |
Custom embroidered patches are priced differently than direct embroidery because they require specialized merrow borders or laser-cut edges. Review our embroidery digitizing cost guide for a complete breakdown of tiered pricing.
Back Patch Digitizing vs Direct Embroidery: Which Is Better
Deciding between a sewn-on emblem and stitching straight onto the garment depends heavily on your production goals.
- Pre-Production Control: Patches allow you to stitch, inspect, and approve hundreds of units before touching a single expensive jacket blank.
- Fabric Preservation: Direct embroidery eliminates border seams, but it demands expert hooping on thick, multi-layered outerwear.
- Versatility: Large logo digitizing files can be adapted for sleeves, while standalone emblems can easily be swapped across seasonal uniforms or team rosters.
For bulk uniform orders, patches usually win out. For premium one-off leather or varsity pieces, direct jacket back embroidery digitizing service provides a seamless, high-end finish.
Choosing the Right Embroidery Digitizing Service for Jacket Backs
Finding a qualified embroidery digitizing service to handle large embroidery tasks saves hours of machine downtime and wasted garments. Always look for a digitizer who manually adjusts density settings per job instead of running automated software templates.
Capital Digitizing provides format-specific underlay mapping and precise push-pull compensation for heavy outerwear. Avoid automated templates to save machine downtime and wasted garments. Always request a physical sample stitch-out on your actual jacket fabric before full production.
Conclusion
Capital Digitizing transforms your boldest jacket back concepts into flawless, production-ready embroidery files. Avoid costly fabric puckering, thread breaks, and misaligned hooping with expert density management and advanced underlay mapping tailored specifically to heavy outerwear. Request your free digitizing sample today and experience professional-grade precision on every run.
Capital Digitizing ensures flawless jacket back embroidery with expert density management and advanced underlay mapping, eliminating fabric puckering.
FAQs
1. Why does jacket back digitizing need different settings than a small logo?
Large hoops stretch differently, requiring adjusted density and underlay to prevent puckering.
2. How many stitches does a typical jacket back design need?
Jacket backs typically range from 15,000 to over 45,000 stitches depending on complexity.
3. Does fabric type (leather, denim, nylon) affect jacket back digitizing?
Yes, different substrates require tailored underlay patterns and specialized pull compensation.
4. How long does a jacket back design take to digitize?
Professional jacket back digitizing typically takes between two and four hours.
5. Can photo-realistic designs be digitized for jacket backs?
Yes, using multi-layer path planning and controlled stitch density drops.
6. How much does jacket back digitizing typically cost?
Cost scales with stitch count and file complexity rather than physical dimensions.