Quick Answer Box
The embroidered patch making process involves six essential steps: artwork submission, custom patch digitizing, thread color selection, embroidery machine stitching, backing and border finishing, and final quality inspection. Custom embroidered patches are the industry standard for durable, professional branding on uniforms, jackets, and merchandise. Professional embroidery digitizing is the vital foundation that determines how embroidery patches are made with high precision, depth, and clarity. At Capital Digitizing, we manage this entire production cycle for clients across the US, offering a 24-hour turnaround on most digitizing and production orders.
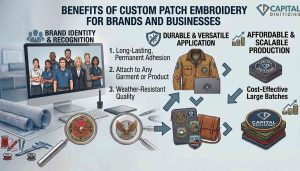
At Capital Digitizing, high-quality thread is utilized to produce custom embroidered patches, which are stitched onto durable textiles like twill. They turn simple logos into awesome 3D, pro-looking badges. Because they are super sturdy and look great, patches rock more than screen-printed designs. For items like uniforms and brand swag, the embroidered patch-making process ensures these are the preferred choice.
What Are Custom Embroidered Patches?
Custom embroidered patches are detailed, sewn designs on durable fabric, typically twill. They successfully change flat digital logos into 3D, professional-looking badges. Understanding how embroidery patches are made provides insight into the quality behind these items.
- Versatile Applications: Caps, jackets, sports team outfits, military clothes, job uniforms, and promotional items are awesome for branding.
- Core Components: These wearables have a tough twill base with durable rayon or polyester thread plus a neat, long-lasting edge from heat cutting or stitching.
- Professional Durability: For spots that rough up clothes a lot, embroidered logos look sharp and stick around longer than those printed ones.
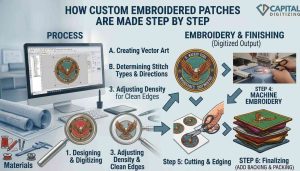
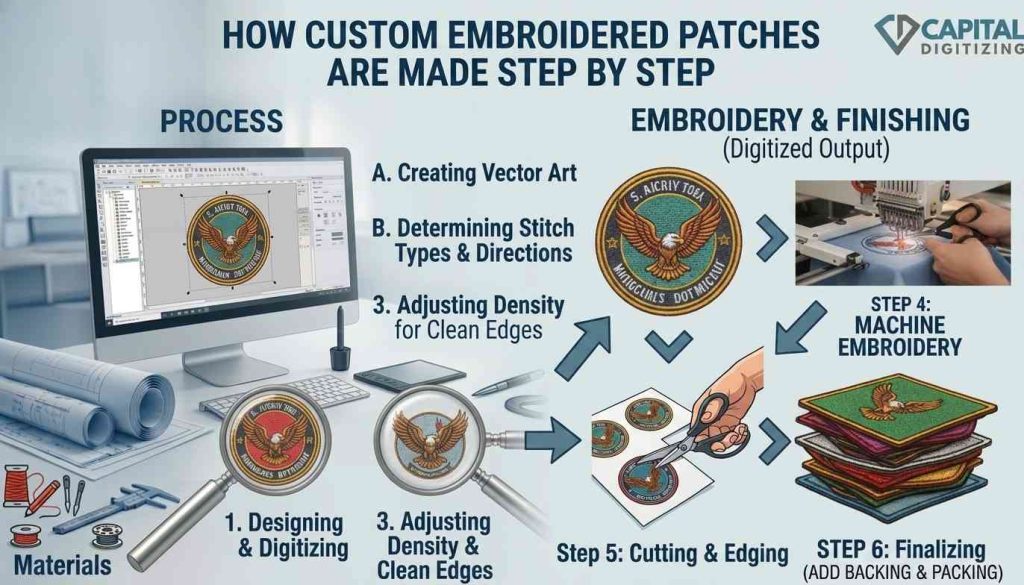
Step 1: Artwork Submission & Design Prep
To kick off the embroidered badge production steps, we begin by evaluating your visual assets. We change your brand’s identity into a form that works for industrial machines.
- File Requirements: We support all regular vector and high-quality image files, including AI, PDF, PNG, and JPG.
- Technical Assessment: Examining stitch density, color complexity, and size, our design team checks out your logo. Proper evaluation supports successful custom patch digitizing and improves production accuracy.
- Design Optimization: To make things clearer, we simplify parts that might look messy with threads, like intricate texts or super-thin lines. This ensures your final patch is easy to read and looks great.
Step 2: Custom Patch Digitizing
Custom patch digitizing turns a picture into a design that can be made on fabric. An embroidery machine needs a clear digital map to know how to copy your design.
- Conversion: We change your artwork into a file format that machines can read, like DST or PES.
- Stitch Mapping: Our experts manually map specific stitch types, such as satin, fill, and running stitches, to different parts of your design to create varying textures.
- Foundation Work: We incorporate underlay stitches and adjust pull compensation. This keeps the fabric smooth and stops it from bunching up while the machine’s running fast, ensuring a professional, flat finish.
Step 3: Thread Color Selection
The visual impact of your patch depends on accurate color reproduction. As we refine how embroidery patches are made, we ensure your brand colors are captured perfectly using high-quality thread systems.
- Color Accuracy: We match your artwork colors to industry-standard Madeira or Isacard charts to ensure brand consistency.
- Complexity Control: We usually advise keeping designs simple by using 6 to 12 colors, which keeps stitching neat and production smooth.
- Premium Enhancements: For a premium look, we offer options like shiny or bright threads to help patches really stand out. These options demonstrate how embroidery patches are made to achieve a premium finish.
Step 4: Embroidery Machine Stitching Process
The embroidery machine stitching process is where mass production meets precision. We use commercial-grade, multi-head machines to bring your design to life.
- The Loading Process: The twill base fabric is loaded into precision embroidery hoops and mounted into the machine.
- Sequential Stitching: The machine reads our digitized file and executes the design layer by layer, building the image from the base up during the embroidery machine stitching process.
- Scalability: With our multi-head equipment, we can whip out 50 to 500+ patches at once. The cool thing is, the first patch looks just as good as the 500th.
Step 5: Backing, Border & Finishing
After sewing is done, we move on to finishing. Throughout the embroidered badge production steps, this phase decides how the patch attaches to your clothes or gear.
- Backing Selection: You’ve got choices like iron-on, adhesive backing, Velcro, or regular sew-on options.
- Border Styles: Pick a traditional “merrowed edge” for a raised, stitched border, or a “hot-cut” finish for a smooth, flat edge that fits well with different shapes.
- Advanced Cutting: We also offer advanced cutting with lasers to make exact shapes for those tricky logo designs that aren’t simple circles or rectangles. Finishing methods further demonstrate how embroidery patches are made to meet professional standards.
Step 6: Quality Inspection & Delivery
We maintain rigorous quality standards. Before any batch is allowed to be shipped, custom patch digitizing and the entire production run are checked in several steps.
- Manual Review: Our technicians check every patch to make sure the thread is tight, everything is lined up correctly, the colors are bright, and the edges are in good condition.
- Defect Mitigation: You only receive premium, expert products since everything that doesn’t live up to our high standards is removed.
- Final Delivery: We make sure your product arrives on time by packaging and labeling it just as you specified, with full tracking. Careful packaging completes the embroidery machine stitching process workflow and ensures customer satisfaction.
DIY vs Professional: Which Should You Choose?
| Factor | DIY at Home | Capital Digitizing |
| Digitizing | Basic/Generic | Professional Custom Mapping |
| Machines | Single-head home | Commercial multi-head |
| Turnaround | Days of setup | 24–48 hours |
| Volume | Small/Slow | 1–500+ / High-Speed |
Conclusion
Choosing a professional embroidery service means your project will get skilled design work and high-quality control. From the first design changes to the last check by hand, these organized embroidered badge production steps ensure a smooth and strong final product. Hire the experts at Capital Digitizing to upgrade how your brand looks and ensure your patches are high-quality and memorable.
Partner with Capital Digitizing for precision-engineered, high-volume embroidered patches that deliver unmatched professional quality for your brand.
FAQs
1. How are custom embroidered patches made step by step?
Patches are digitized, stitched, finished, and inspected.
2. What materials are used in embroidered patch production?
Twill bases and high-quality polyester or rayon threads are used.
3. What is embroidery digitizing in patch making?
It is converting digital logos into machine-readable stitching maps.
4. How long does it take to produce a custom patch?
Professional production typically requires 24–48 hours for setup.
5. What are the different types of patch backings?
Options include iron-on, adhesive, Velcro, and standard sew-on.
6. Can embroidered patches be made from a logo or photo?
Yes, we convert vector or high-resolution images into patches.