Modern embroidery digitizing is a skill that combines careful technical work with creativity. When you work on making a logo for embroidery, you aren’t just changing a file; you are turning pictures into real threads. Photo embroidery digitizing becomes more difficult since it requires proper knowledge of how colors should be combined and how varied textures should be created. If you want to convert embroidery designs into digital format in a local enterprise, or you would like to create elaborate logos, then you must have good stitching skills. While many people focus only on basic shapes, we’re diving into the “physics” of thread to help you avoid common production nightmares.
Why Complex Designs Are Hard to Digitize
Numerous beginners assume embroidery is like printing, but thread behaves differently from ink. Logo digitizing for embroidery is difficult because the thread has physical weight and tension.
- The Scale Problem: A logo with fine text under 4mm tall often “collapses” because the needle creates holes too close together.
- The Gradient Trap: Photos rely on millions of colors; embroidery is limited by the number of needles on a machine.
- Fabric Push and Pull: As stitches are applied, they pull the fabric. Without expert logo digitizing for embroidery, your circles will look like ovals, and your outlines won’t line up.
Check out our logo embroidery digitizing page to see how we tackle these physics-based challenges.
Step 1: Preparing Your Artwork (Image Resolution Matters)
Before you open any software, look at your source. High Image Resolution is the foundation of custom embroidery digitizing and is essential for anyone learning how to digitize complex logos for embroidery.
- Vector is King: Use AI, EPS, or SVG files whenever possible. They allow for infinite scaling without pixelation.
- Raster Requirements: If you only have a JPG or PNG, it must be at least 300 DPI for proper photo embroidery digitizing.
- The Contrast Rule: For photos, avoid “flat” lighting. High-contrast images help the digitizer identify where one tonal zone ends and another begins.
At Capital Digitizing, we often redraw low-quality art for our clients because a blurry image always leads to a blurry stitch-out.
Step 2: Choosing the Right Digitizing Software
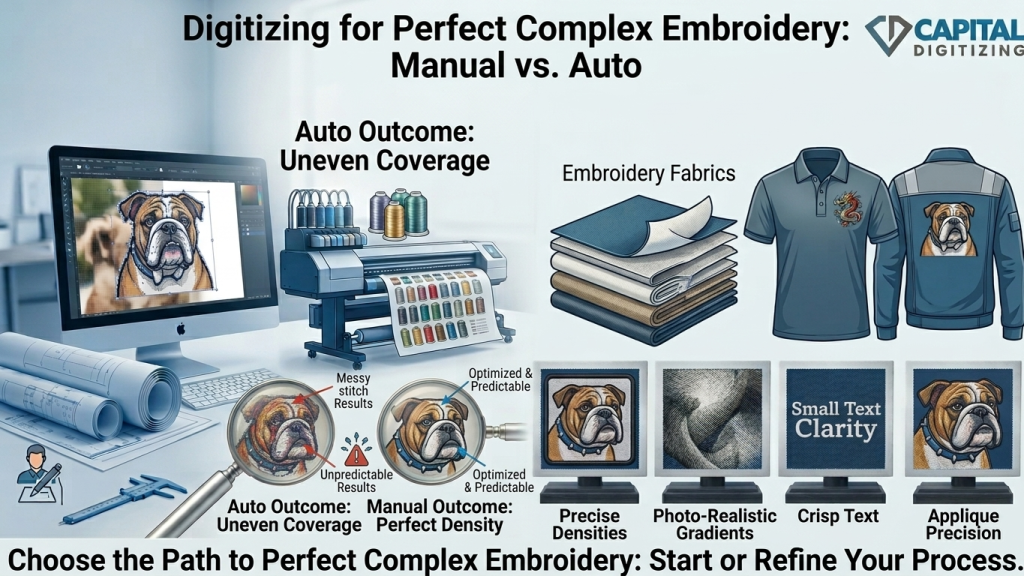
Not all software is created equal. While “auto-digitizing” features exist, they almost always fail on complex designs.
- Wilcom: The industry gold standard for professional studios. It offers the most control over density and specialty stitches.
- Hatch: Developed by Wilcom, this is the best mid-tier option for hobbyists or small shops working on logo digitizing for embroidery.
- The Manual Edge: For embroidery digitizing that actually looks professional, manual “punching” (drawing every path by hand) is required.
Our team utilizes professional-grade Wilcom suites to ensure every custom embroidery digitizing project is optimized for high-speed industrial machines.
Step 3: Selecting the Right Stitch Types
Choosing the right stitch is like selecting the right brush for a painting, especially in photo embroidery digitizing, where texture matters.
- Satin Stitch: Best for text and narrow shapes. It gives that classic raised look, but shouldn’t be wider than 8-10mm, or it will loop and snag.
- Fill Stitch (Tatami): Best for large color blocks and backgrounds. It provides a flat, durable finish.
- Running Stitch: Best for outlines, fine details, and underlay paths. It is too light for coverage but essential for adding definition.
For successful logo digitizing for embroidery, layering these correctly is what separates an amateur result from a professional one.
Step 4: Mapping the Stitch Path
The Stitch Path is the “travel plan” the needle follows. A poor path leads to “jump stitches” (long threads that must be trimmed by hand) and registration errors. If you want to learn how to digitize complex logos for embroidery, you must master the sequence.
- Start from the Center: For caps, digitize from the center out to prevent the fabric from shifting.
- Layering: Start with the underlay, then the large fills, and save the fine details and text for last.
- Efficiency: A well-mapped Stitch Path minimizes machine stops, saving you hours in a long production run.
See more about our mapping process on the image embroidery digitizing page.
Step 5: Test, Refine, and Export
Never go straight to the final garment.
- Test Sew: Use a scrap piece of the same fabric.
- Adjust Pull Comp: If your circles are gaps, increase your pull compensation in the software.
- Export: Save in the format your machine needs (DST for Tajima, PES for Brother, etc.).
Capital Digitizing provides all major formats with every order, ensuring your custom embroidery digitizing is compatible with any machine. To understand how to digitize complex logos for embroidery properly, you must account for the fabric’s movement during the test sew.
Logo vs Photo Digitizing: Key Differences
| Factor | Logo Digitizing | Photo Embroidery Digitizing |
| Source File | Vector preferred (AI/EPS) | High-res Photo (300 DPI+) |
| Stitch Focus | Clean lines & crisp text | Blended fills & tonal shifts |
| Complexity | High (Detail specific) | Extremely High (Texture specific) |
| Min. Size | 1 inch (25mm) | 3-4 inches (75mm+) |
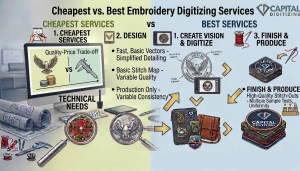
When to DIY vs Hire a Professional Digitizer
Digitizing is a steep learning curve. While DIY is great for basic names or easy shapes, custom embroidery digitizing for brand logos or portraits is frequently better left to pros. Understanding how to digitize complex logos for embroidery requires years of practice with different fabric types.
Understanding why digitizing embroidery is important for high-quality stitching can help you avoid common production errors.
Why Outsource?
- Cost: Mistakes cost money in ruined thread and garments.
- Speed: We deliver your designs without delays.
- Quality: Professionals in digitization know how to compensate for different fabrics (pique vs. performance polyester).
Conclusion
Digitizing intricate logos and pictures is an art form. Through skillful use of software and stitching techniques, you can achieve professional results. Embroidering pictures involves further development of these skills through the emphasis on realism. For quality assurance and promptness, turn to Capital Digitizing.
Capital Digitizing delivers precision-crafted embroidery files with expert stitch control, ensuring flawless, production-ready results every time.
FAQs
How to digitise a logo for embroidery?
Manually trace artwork in software like Wilcom, setting Stitch Paths and choosing Satin or Fill stitches.
How to turn images into embroidery files?
Ensure high Image Resolution (300 DPI) and use digitizing software to map every stitch zone manually.
What software is used to digitize embroidery designs?
Professional studios primarily use Wilcom or Hatch for precise custom embroidery digitizing and density control.
Can AI do embroidery digitizing?
AI can “auto-digitize,” but it often fails on complex logos, requiring manual refinement for production quality.
How to vectorize an image for embroidery?
Use Adobe Illustrator to trace raster images into clean paths before importing them into digitizing software.